How to Avoid Liquidation When Trading with Leverage
A practical, beginner-friendly walkthrough of how liquidation actually works and the specific habits — leverage choice, position sizing, margin mode, and stop-loss placement — that keep a losing trade from turning into a liquidated one.
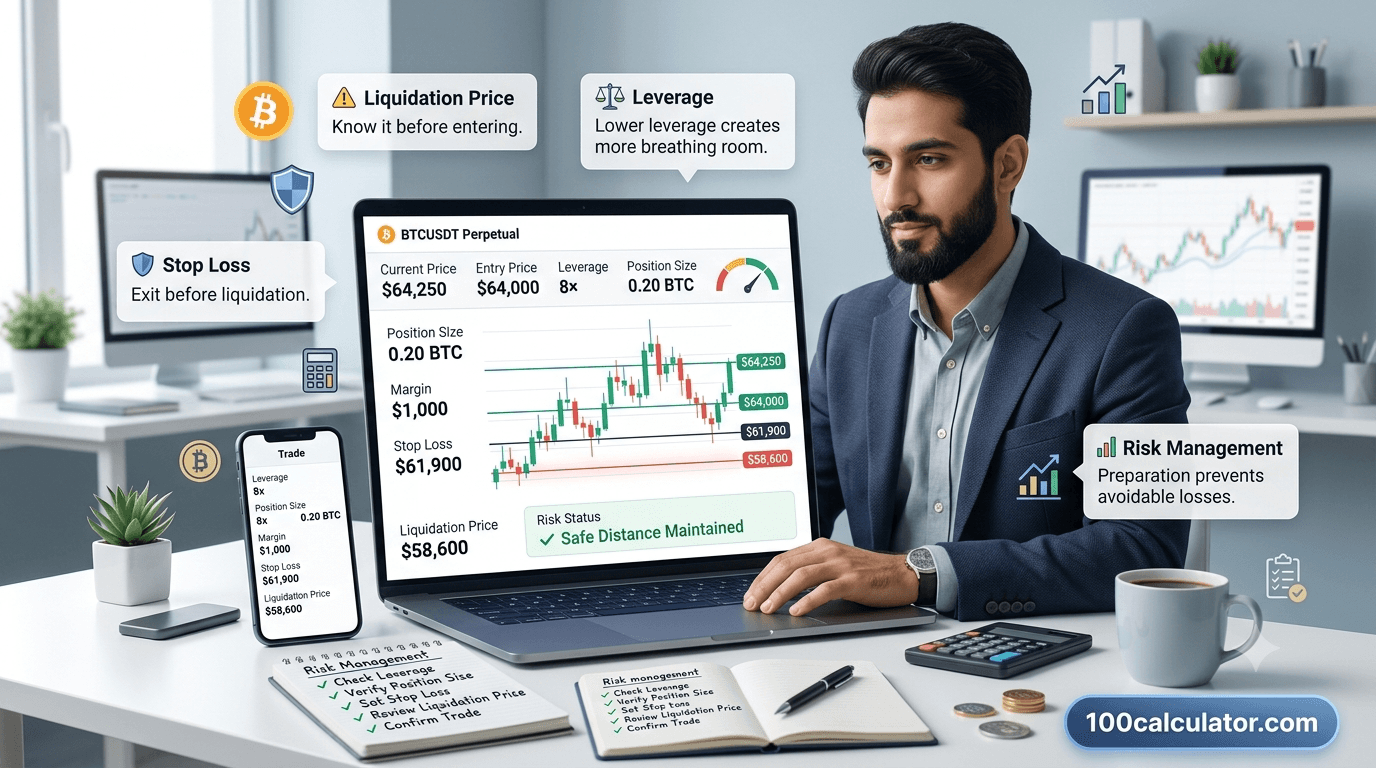
Leverage is what makes a small account feel powerful — and it's exactly why so many crypto traders get wiped out on a single bad move. Open a 10x position and a 10% swing against you can end the trade. Open a 50x position and it only takes about 2%. Most beginners don't learn that math until after it's already cost them money.
Liquidation happens when your losses use up the margin backing a leveraged position, and the exchange force-closes the trade to keep your account from going negative. You avoid it by using less leverage than the maximum available, sizing your position before you pick your leverage, knowing your exact liquidation price before you enter, and setting a stop-loss with real room above it. None of that requires advanced trading skill — it just requires doing the math before you open the trade, instead of after.
That's the part 100 Calculator's Crypto Liquidation Price Calculator handles for you. Enter your entry price, leverage, and margin mode, and it shows you exactly where your liquidation point sits before you ever click confirm.
This guide walks through how leverage and liquidation actually work, why traders get caught out, and the habits — leverage level, position sizing, margin mode, and stop-loss placement — that keep a losing trade from becoming a liquidated one.
Understanding Leverage and Liquidation
Before you can avoid liquidation, it helps to know exactly what's happening when it occurs. It isn't random, and it isn't the exchange "against you" — it's a mechanical safety process with clear rules.
What Leverage Actually Does to Your Position
Leverage lets you control a position larger than your account balance by borrowing the rest of the exposure. With 10x leverage, $500 controls a $5,000 position. Every price move now affects that full $5,000, not just your $500, which is why leverage multiplies both gains and losses instead of just one of them.
What "Liquidation" Means in Practice
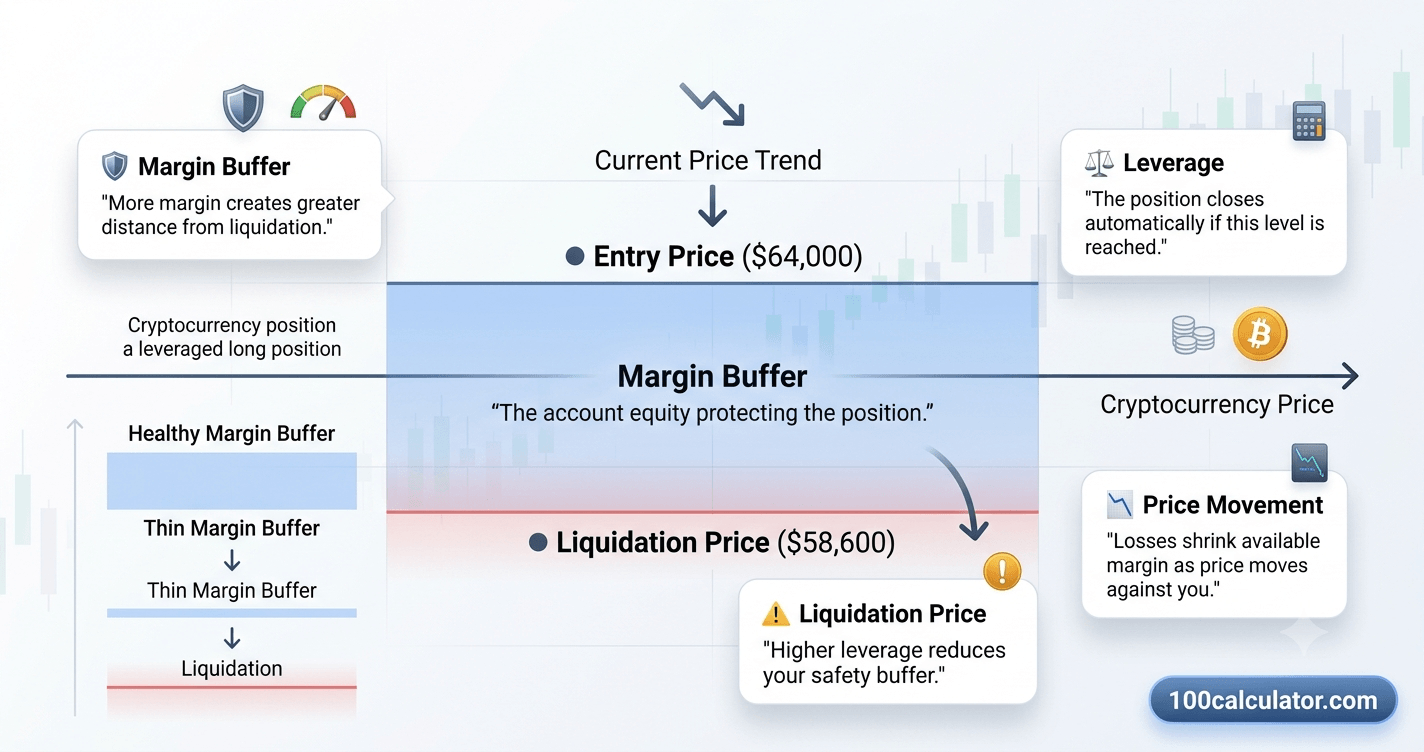
Liquidation is the exchange automatically closing your position because your remaining equity has dropped to the minimum level it requires to keep the trade open. It's a protective mechanism — for the exchange and, in isolated margin, for the rest of your account — not a penalty. But it usually means the margin assigned to that trade is gone.
Margin, Maintenance Margin, and Liquidation Price
Three terms come up constantly here, so it's worth defining them clearly. Your margin is the collateral you post to open the trade. Your maintenance margin is the minimum equity the exchange requires you to keep in that position at all times. Your liquidation price is the price level at which your equity would fall to that maintenance margin threshold, triggering an automatic close.
Why Traders Get Liquidated: The Real Causes
Liquidation rarely comes from one dramatic mistake. It's usually a combination of smaller ones that add up faster than they seem like they should:
- Leverage that doesn't match the asset's normal swings — a coin that regularly moves 8% in a day leaves almost no room at 15x leverage.
- No stop-loss, or one placed too close to entry to matter before liquidation takes over.
- Adding margin to a losing trade repeatedly instead of accepting that the original idea was wrong.
- Ignoring funding fees on positions held for days or weeks, which slowly shrink the margin buffer.
- Trading through scheduled volatility — economic data, major unlocks, or thin weekend liquidity — without adjusting size.
- Stacking correlated positions in cross margin without adding up what they risk together.
None of these require bad luck. Each one is a decision made before the trade goes wrong, which means each one is also preventable.
How to Calculate Your Liquidation Price
Every exchange calculates liquidation price slightly differently once fees and maintenance margin are factored in, but the underlying relationship is simple enough to estimate by hand. For a deeper breakdown of the full calculation, see our companion guide on how liquidation price is calculated in crypto futures.
A Simplified Formula for Isolated Margin
Simplified Liquidation Price Estimate
Long position: Liquidation Price ≈ Entry Price × (1 − 1 ÷ Leverage) Short position: Liquidation Price ≈ Entry Price × (1 + 1 ÷ Leverage)
Entry Price — the price you opened the position at.
Leverage — the multiplier you selected, such as 10x.
Why "simplified" — this version ignores maintenance margin and trading fees, so your exchange's real liquidation price usually sits a little closer to your entry than this estimate suggests.
Long Position Example
Say you open a long position on Bitcoin at $60,000 with 10x leverage, using isolated margin. The simplified estimate is $60,000 × (1 − 1/10) = $54,000 — roughly a 10% drop from your entry. At 20x leverage on the same entry, that estimate tightens to roughly $57,000, only about a 5% drop away.
Short Position Example
Now say you short Ethereum at $3,000 with 5x leverage. The estimate is $3,000 × (1 + 1/5) = $3,600 — about 20% above your entry. The math mirrors the long example, just moving in the opposite direction, since a short position loses money as price rises instead of falls.
Free Online Tool
Skip the manual math
100 Calculator's Crypto Liquidation Price Calculator works out your exact liquidation price from your entry price, leverage, and margin mode, so you know precisely where the line sits before you place the trade, not after.
Choosing a Safer Leverage Level
Leverage and liquidation buffer move in opposite directions. The higher your leverage, the less room price has to move against you before you're liquidated — and that relationship isn't gradual, it's steep.
| Leverage | Approx. Move to Liquidation | Rough Risk Level |
|---|---|---|
| 2x | ~50% | Low |
| 3x | ~33% | Low |
| 5x | ~20% | Medium |
| 10x | ~10% | Medium-High |
| 20x | ~5% | High |
| 50x | ~2% | Very High |
| 100x | ~1% | Extreme |
Matching leverage to your own risk tolerance, rather than to whatever your exchange offers as a default, makes the rest of your risk management much easier:
Conservative
2x–3x
Wide Safety Margin
Roughly a 33-50% buffer before liquidation. Suits volatile altcoins, new strategies, or anyone still learning exactly how their exchange calculates liquidation price.
Moderate
5x–10x
Balanced Risk
Roughly a 10-20% buffer before liquidation. Works best paired with a tested strategy, a firm stop-loss, and a position size you calculated in advance.
Aggressive
20x+
Thin Safety Margin
5% or less buffer before liquidation. Better reserved for short, tightly planned trades with strict risk controls — not a way to make a small account grow faster.
Position Sizing: Your Best Defense Against Liquidation
Leverage decides how much exposure your margin controls. Position size decides how much of your account that margin represents in the first place — and it's usually the bigger factor in whether a single bad trade actually hurts.
The 1-2% Account Risk Rule
Many experienced traders size positions so that a single stopped-out trade costs no more than 1-2% of their total account balance. This isn't a rule about leverage directly — it's about how much margin you put into any one trade. You can use 10x leverage and still follow this rule comfortably, simply by assigning a smaller dollar amount of margin to the position. Our guide on how to size crypto positions based on risk tolerance walks through this in more detail.
How Position Size and Leverage Work Together
A common beginner mistake is picking leverage first, then sizing the position around whatever margin is left over. It works better in reverse: decide how much you're willing to risk in dollars, then choose leverage based on where that puts your liquidation price relative to your stop-loss. 100 Calculator's Crypto Position Size Calculator can help you work backward from your risk tolerance to an appropriate position size.
Isolated Margin vs Cross Margin
Your margin mode decides which funds back a losing trade, and it changes your liquidation risk as much as your leverage does.
How Isolated Margin Limits the Damage
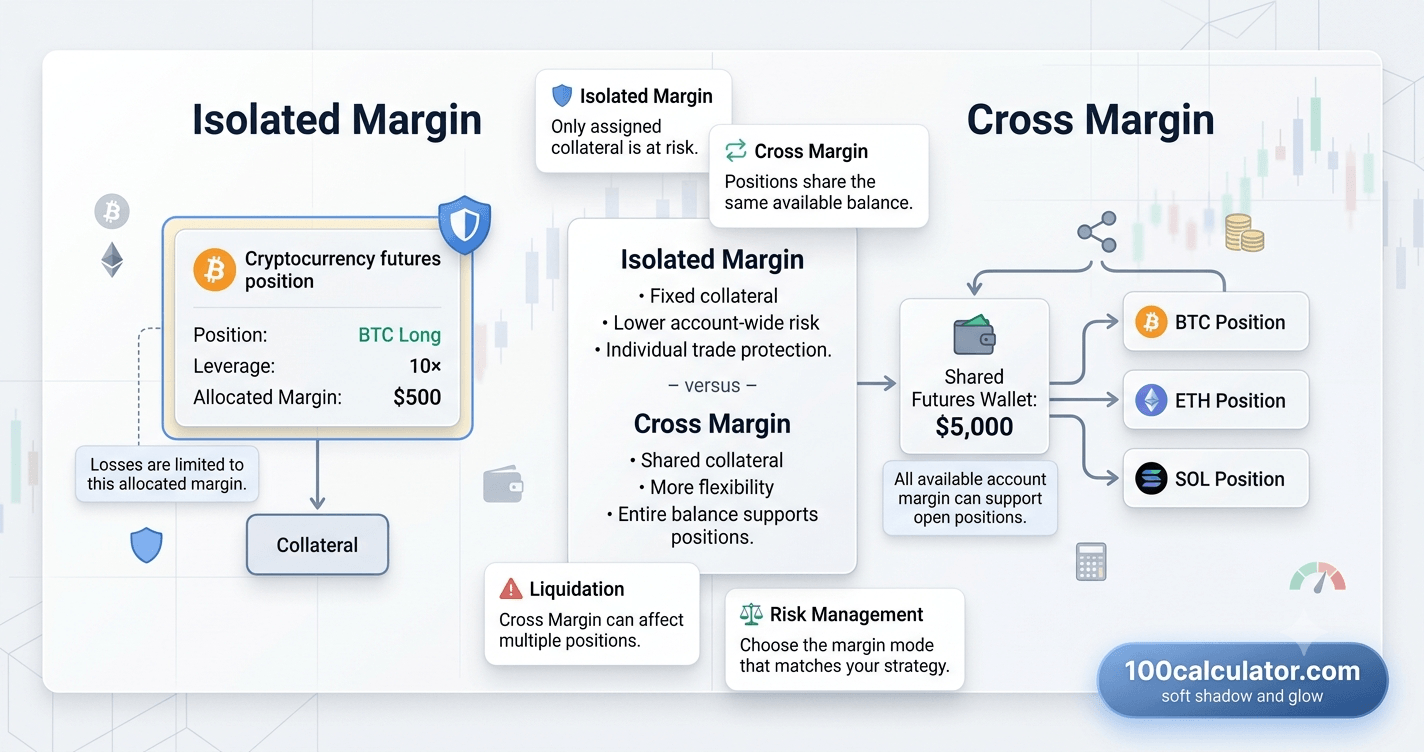
Isolated margin assigns a fixed amount of collateral to one position. If the trade goes badly, your loss is capped at whatever you assigned — the rest of your account balance stays untouched. The tradeoff is that your liquidation price sits closer to your entry, since only that assigned amount is backing the trade.
How Cross Margin Spreads — and Shares — the Risk
Cross margin uses your entire futures wallet balance as shared collateral across every open position. That pushes each position's liquidation price further away, which can help a temporarily losing trade survive a short-term dip. The tradeoff is that a bad move on one position can now draw down funds meant to support your other positions too.
| Feature | Isolated Margin | Cross Margin |
|---|---|---|
| What's at risk | Only the margin assigned to that position | Your entire futures wallet balance |
| Liquidation price | Closer to your entry price | Further from your entry price |
| Best suited for | Beginners, high-risk or experimental trades | Experienced traders managing related positions |
| Main danger | That one position liquidates faster | One losing position can drag down your whole account |
Which One Should You Use?
If you're not sure, start with isolated margin. It makes your worst case easy to define before you enter the trade, which matters more than the extra buffer cross margin provides — especially while you're still building a feel for how your exchange calculates liquidation price.
Using Stop-Loss Orders Strategically
A stop-loss doesn't just protect your capital — used well, it protects your account from ever reaching liquidation in the first place.
Placing Your Stop-Loss With Room to Breathe
Set your stop-loss with meaningful distance from your calculated liquidation price, not right next to it. A stop placed too close can get triggered by ordinary short-term noise, while a stop placed with no buffer at all risks getting skipped entirely if price gaps through it during a fast move.
Why Slippage Means a Stop-Loss Isn't a Guarantee
In fast-moving markets, a stop-loss order can fill at a worse price than you set, a gap known as slippage. That's not a reason to skip stop-losses — it's a reason to treat "I have a stop-loss" and "I definitely can't get liquidated" as two different statements.
Combining Stop-Loss With a Take-Profit Plan
Deciding your exit — both the losing and winning scenario — before you enter a trade removes the temptation to move your stop-loss further away "just this once" while the position is underwater. 100 Calculator's Risk Reward Ratio Calculator can help you check whether a planned stop-loss and take-profit combination is actually worth the trade before you place it.
Adding Margin and Managing Funding Fees
Two quieter factors also shift your liquidation price over time: how you respond to a losing trade, and how long you hold it.
When Adding Margin Makes Sense
Adding margin moves your liquidation price further away, buying a position more room. That can be reasonable if your original analysis still holds and you set a clear limit on how much more you're willing to add — treated as a deliberate decision, not a reflex.
When It's Just Delaying a Bigger Loss
Adding margin doesn't fix why a trade is losing. If you're doing it repeatedly, without a plan for where it stops, you're usually not managing risk — you're postponing the moment you accept the trade was wrong, often at a worse price than if you'd closed it earlier.
How Funding Fees Quietly Erode Your Margin
If you're trading perpetual futures, funding payments are exchanged directly between long and short traders, typically every 8 hours, to keep the contract price aligned with spot. Each payment is usually small, but held over weeks on the paying side, it steadily shrinks your margin buffer even if price hasn't moved much. Our guides on what a funding rate is in crypto futures trading and how funding fees affect long-term futures positions cover this in more depth. 100 Calculator's Crypto Futures Funding Fee Calculator can help you estimate that cost before holding a leveraged position for an extended period.
Common Mistakes That Lead to Liquidation
Even traders who understand the mechanics above still get liquidated sometimes. Usually it comes down to one of these habits:
- Using the maximum leverage available instead of the leverage your actual plan calls for.
- Treating the stop-loss as optional once you feel confident about a trade.
- Averaging down repeatedly into a losing position without a limit in mind.
- Holding several correlated positions in cross margin without adding up their combined risk.
- Forgetting about funding fees on positions held open for days or weeks.
- Opening or holding a highly leveraged position through a major scheduled news event without adjusting size first.
Reading Volatility and Market Conditions
Leverage that feels comfortable in a calm market can become genuinely dangerous once volatility picks up, even without changing your position.
High-Volatility Events Worth Watching For
Major economic data releases, large scheduled token unlocks, and thin weekend liquidity can all widen price swings quickly. In fast-moving markets, a wave of leveraged positions can hit their liquidation prices within minutes of each other, and the forced closing adds its own pressure on top of the original move — part of why big swings often look even more extreme in a short window.
Adjusting Leverage Before You Trade Through Them
You don't need to predict volatility perfectly to plan around it. Lowering leverage, reducing position size, or simply staying flat going into a known high-risk window are all reasonable choices that cost you very little on a quiet day and can save your account on a wild one.
What to Do If You're Close to Liquidation
Sometimes a trade gets away from you despite reasonable planning. What you do in that moment matters as much as how you got there.
Immediate Options When a Position Is Underwater
Your realistic options are usually to close some or all of the position to lock in a smaller loss, add margin deliberately if your original thesis genuinely still holds, or let your stop-loss run its course. Deciding calmly is easier when you've already thought through what you'd do in this situation before it happens.
When Cutting Losses Beats Adding Margin
If you're adding margin mainly because the alternative feels uncomfortable, rather than because your analysis changed, that's usually a sign to close the position instead. A smaller, accepted loss is easier to recover from than a larger one that arrives anyway a few hours later. 100 Calculator's Drawdown Recovery Calculator shows just how much harder a bigger loss is to earn back, which can make that decision easier in the moment.
Related Calculators
Put what you just read into practice, try these free tools instantly, no sign-up required.
Crypto Position Size Calculator
Calculate the right crypto position size for your risk level.
Crypto Liquidation Price Calculator
Find the price at which your leveraged crypto position liquidates.
Crypto Futures Funding Fee Calculator
Estimate funding fees paid or earned on crypto futures positions.
APY ↔ APR Crypto Yield Calculator
Convert between APY and APR to compare real crypto yields.
Impermanent Loss Calculator
Estimate impermanent loss when providing liquidity to a pool.
Building a Risk Management Routine That Sticks
Avoiding liquidation isn't really about mastering one formula — it's about repeating a handful of small habits until they become automatic.
- Decide your maximum leverage before you open the trading app, not while you're already looking at a chart and feeling confident.
- Size the position first, then check what leverage that implies, rather than picking leverage first and sizing around what's left.
- Calculate your liquidation price before every entry, even on trades you feel sure about.
- Set your stop-loss the moment your entry fills, not "in a few minutes" once you've watched the first candle.
- Review closed trades weekly and note which mistake — leverage, sizing, or a missing stop-loss — keeps showing up.
Once you've settled on an entry price, leverage, and margin mode, running the numbers through 100 Calculator's Crypto Liquidation Price Calculator takes a few seconds and removes the guesswork from the one number that matters most before you place a leveraged trade.
Trading disclaimer: This article is for general educational purposes only and isn't financial or investment advice. Leveraged and margined cryptocurrency trading carries a high risk of loss, including the potential loss of your entire margin balance, and may not be suitable for every trader. The liquidation price examples in this guide are simplified and may not match your exchange's exact calculation, which typically also accounts for maintenance margin and fees — see the CFTC's customer advisory on virtual currency trading and the SEC's investor bulletin on margin trading for more on how leverage and margin risk are regulated. Always review your platform's specific margin rules and consider speaking with a licensed financial advisor before trading with leverage.
More From Our Crypto Calculator Guide
Still building your understanding of position sizing, margin, and futures trading costs? These related guides dig deeper into the topics covered above.
Frequently Asked Questions
What does it mean when a crypto position gets liquidated?
Liquidation means an exchange automatically closes your leveraged position because your remaining margin can no longer cover further losses. It happens once the market moves against you enough that your equity falls to the maintenance margin level the exchange requires. Depending on your margin mode, you lose the margin assigned to that trade (isolated margin) or a larger share of your account balance (cross margin).
How is a liquidation price calculated?
Exchanges calculate liquidation price using your entry price, leverage, margin mode, and maintenance margin requirement. A simplified version for isolated margin, ignoring fees, is entry price × (1 − 1/leverage) for a long position and entry price × (1 + 1/leverage) for a short position. Your exchange's actual figure will sit slightly closer to your entry price once maintenance margin and fees are factored in, so treat manual math as an estimate and check the exact number with a liquidation price calculator before trading.
What's a safe leverage level for beginners?
Most beginners are better off starting around 2x to 3x leverage, since that leaves a liquidation buffer of roughly 30% or more — enough room to survive normal price swings without getting forced out of a position that might have recovered. Higher leverage isn't automatically wrong, but it demands a tighter, more disciplined risk management plan, including a firm stop-loss and a position size you calculated in advance rather than the maximum your exchange allows.
What's the difference between isolated margin and cross margin?
Isolated margin assigns a fixed amount of collateral to one position, so your loss on that trade is capped at whatever you assigned. Cross margin uses your entire futures wallet balance as shared collateral across all open positions, which pushes each position's liquidation price further away but exposes more of your account if things go wrong. Beginners and anyone testing a new strategy are usually better off with isolated margin, since the maximum loss on any single trade is easier to define upfront.
Can you completely avoid liquidation?
Not entirely — any leveraged position carries some liquidation risk, since leverage by definition means a big enough price move can outpace your margin. What you can control is how likely and how damaging it is: lower leverage, smaller position sizes, a stop-loss placed with room to breathe, and sticking to isolated margin until you're managing multiple related positions carefully. Combined, these habits make liquidation rare rather than eliminating the possibility outright.
Does adding more margin stop a position from being liquidated?
Adding margin moves your liquidation price further away, which can buy a losing position more room, but it doesn't fix why the trade is losing in the first place. If the market keeps moving against you, you've simply put more money at risk of the same outcome. Adding margin can make sense if your original analysis is still valid and you set a clear limit on how much more you'll add; it becomes a mistake when it's really just delaying an exit you already know you should make.
Does a stop-loss order guarantee I won't get liquidated?
No. A stop-loss tells the exchange to close your position at a chosen price, but in fast-moving markets, orders can fill at a worse price than requested due to slippage. Placing your stop-loss with meaningful distance from your liquidation price — rather than right next to it — gives you a much better chance of exiting on your own terms before liquidation takes over, even though it isn't an absolute guarantee.
Why do funding fees increase liquidation risk over time?
Perpetual futures contracts use funding payments, exchanged directly between long and short traders every few hours, to keep the contract price in line with the spot market. If you're on the side paying funding, that cost is deducted from your position's margin. It's usually small per payment, but held over days or weeks it can meaningfully shrink your margin buffer, quietly nudging your position closer to its liquidation price even if the underlying price hasn't moved much.
What actually triggers liquidation — the price on the chart or something else?
Most crypto futures exchanges trigger liquidation based on the mark price, not the last traded price shown on your chart. The mark price is a smoothed reference designed to reduce manipulation from short-term order book spikes. This matters because your position can occasionally be liquidated even when the candle you're watching looks fine, since the mark price briefly diverged from it. Always check which price your exchange uses for liquidation in its documentation.
How much of my account should I risk on a single trade?
Many traders use a 1% to 2% rule, meaning a single losing trade — assuming your stop-loss is respected — costs no more than 1% to 2% of your total account balance. This isn't a rule about leverage directly; it's about position size. You can use higher leverage and still follow this rule by simply putting less capital into the position, since leverage changes your exposure, not automatically how much you're risking.
Is high leverage ever a reasonable choice?
High leverage isn't automatically reckless, but it demands more precision. It tends to suit short, carefully planned trades where the trader has a tight stop-loss, a clear invalidation point, and a small position size relative to their account. Using high leverage as a way to "make a small account grow faster" without those controls is one of the more common ways beginners get liquidated quickly.
What is a margin call, and does crypto trading have them?
A margin call is a broker's request for more collateral before a position is closed — common in traditional stock margin trading. Most crypto futures exchanges skip that step and move straight to automatic liquidation once margin falls below the required maintenance level, often with little or no advance warning. That's why checking your liquidation price in advance matters more in crypto trading than in markets where a margin call buys you extra time.
About 100 Calculator
100 Calculator is a free hub of online calculators and educational guides covering health, finance, trading, crypto, education, and more. Every tool is built to be fast, accurate, and genuinely free, with no account or signup required.
We built this guide, and tools like the Crypto Liquidation Price Calculator referenced throughout it, to make leveraged trading mechanics easier to understand before you put real money on the line. Head back to the 100 Calculator homepage to explore the full library of tools, or learn more about the team behind them on our About Us page.